Software installation using conda
Overview
Teaching: 20 min
Exercises: 5 minQuestions
What are the main Python libraries used in atmosphere and ocean science?
How do I install and manage all the Python libraries that I want to use?
Objectives
Identify the main Python libraries used in atmosphere and ocean science and the relationships between them.
Explain the advantages of Anaconda over other Python distributions.
Extend the number of packages available via conda using conda-forge.
Create a conda environment with the libraries needed for these lessons.
The PyAOS stack
Before we jump in and start analysing our netCDF precipitation data files, we need to consider what Python libraries are best suited to the task.
For reading, writing and analysing data stored in the netCDF file format, atmosphere and ocean scientists will typically do most of their work with either the xarray or iris libraries. These libraries are built on top of more generic data science libraries like numpy and matplotlib, to make the types of analysis we do faster and more efficient. To learn more about the PyAOS “stack” shown in the diagram below (i.e. the collection of libraries that are typically used for data analysis and visualisation in the atmosphere and ocean sciences), check out this post.

Python distributions for data science
Now that we’ve identified the Python libraries we might want to use, how do we go about installing them?
Our first impulse might be to use the Python package installer (pip), but until recently pip only worked for libraries written in pure Python. This was a major limitation for the data science community, because many scientific Python libraries have C and/or Fortran dependencies. To spare people the pain of installing these dependencies, distributions like Anaconda and Canopy have been released, which come with the most popular data science libraries and their dependencies pre-installed. These distributions also come with a package manager for installing libraries that weren’t pre-installed. This tutorial focuses on conda, which is the package manager associated with Anaconda (as we’ll see, it has some advantages over the Canopy package manager).
Introducing conda
According to the latest documentation,
Anaconda comes with over 150 of the most widely used data science libraries (and their dependencies) pre-installed.
In addition, there are over 250 libraries available via the conda install command,
which can be executed using the Bash Shell or Anaconda Prompt (Windows only).
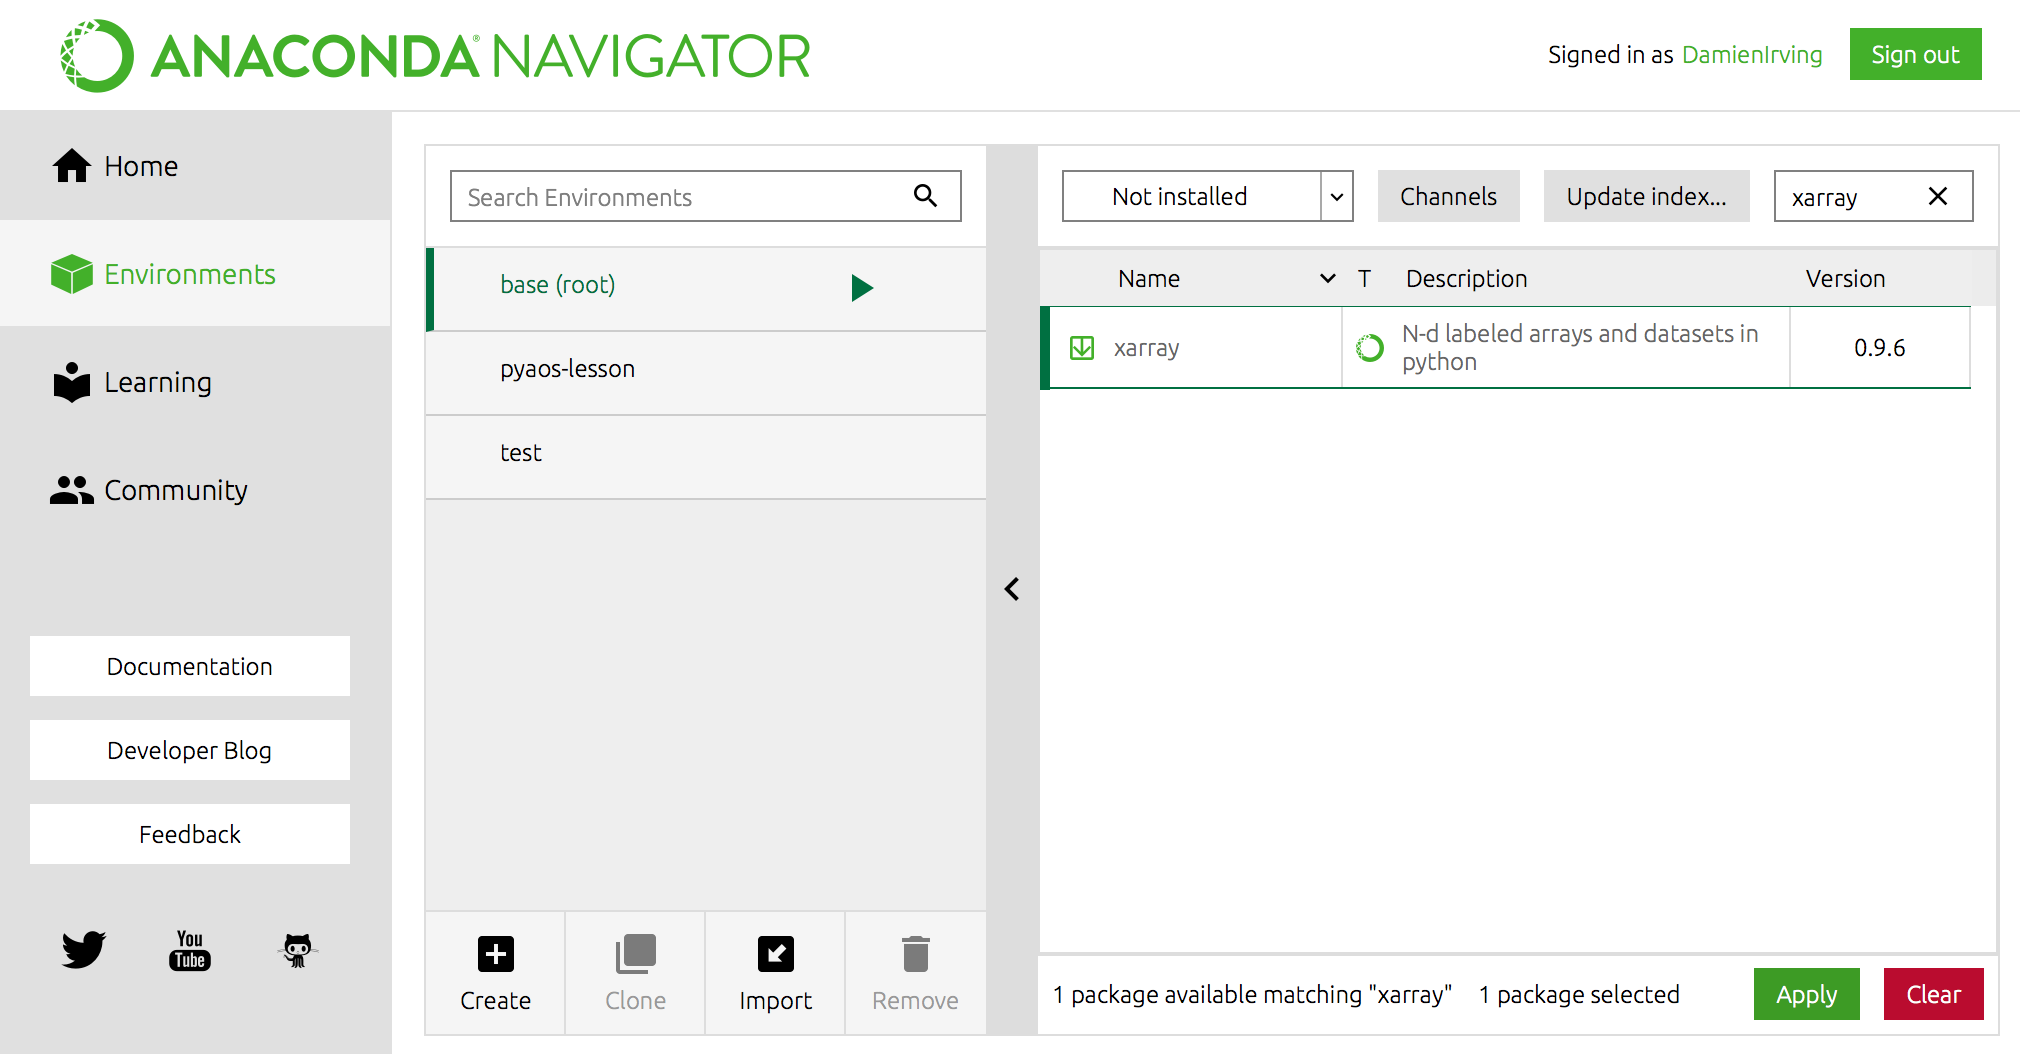
It is also possible to install packages using the Anaconda Navigator graphical user interface.
For instance, the popular xarray library could be installed using the following command,
$ conda install xarray
(Use conda search -f {package_name} to find out if a package you want is available.)
OR using Anaconda Navigator:

Miniconda
If you don’t want to install the entire Anaconda distribution, you can install Miniconda instead. It essentially comes with conda and nothing else.
Advanced conda
This is all great, but up until now Anaconda gives us nothing that Canopy doesn’t. The real advantage of Anaconda is the Anaconda Cloud website, where the community can contribute conda installation packages. This is critical for the atmosphere and ocean science community, because many of our libraries are discipline specific, which means they’ll never make it into the top 400 or so data science libraries supported by Anaconda and Canopy.
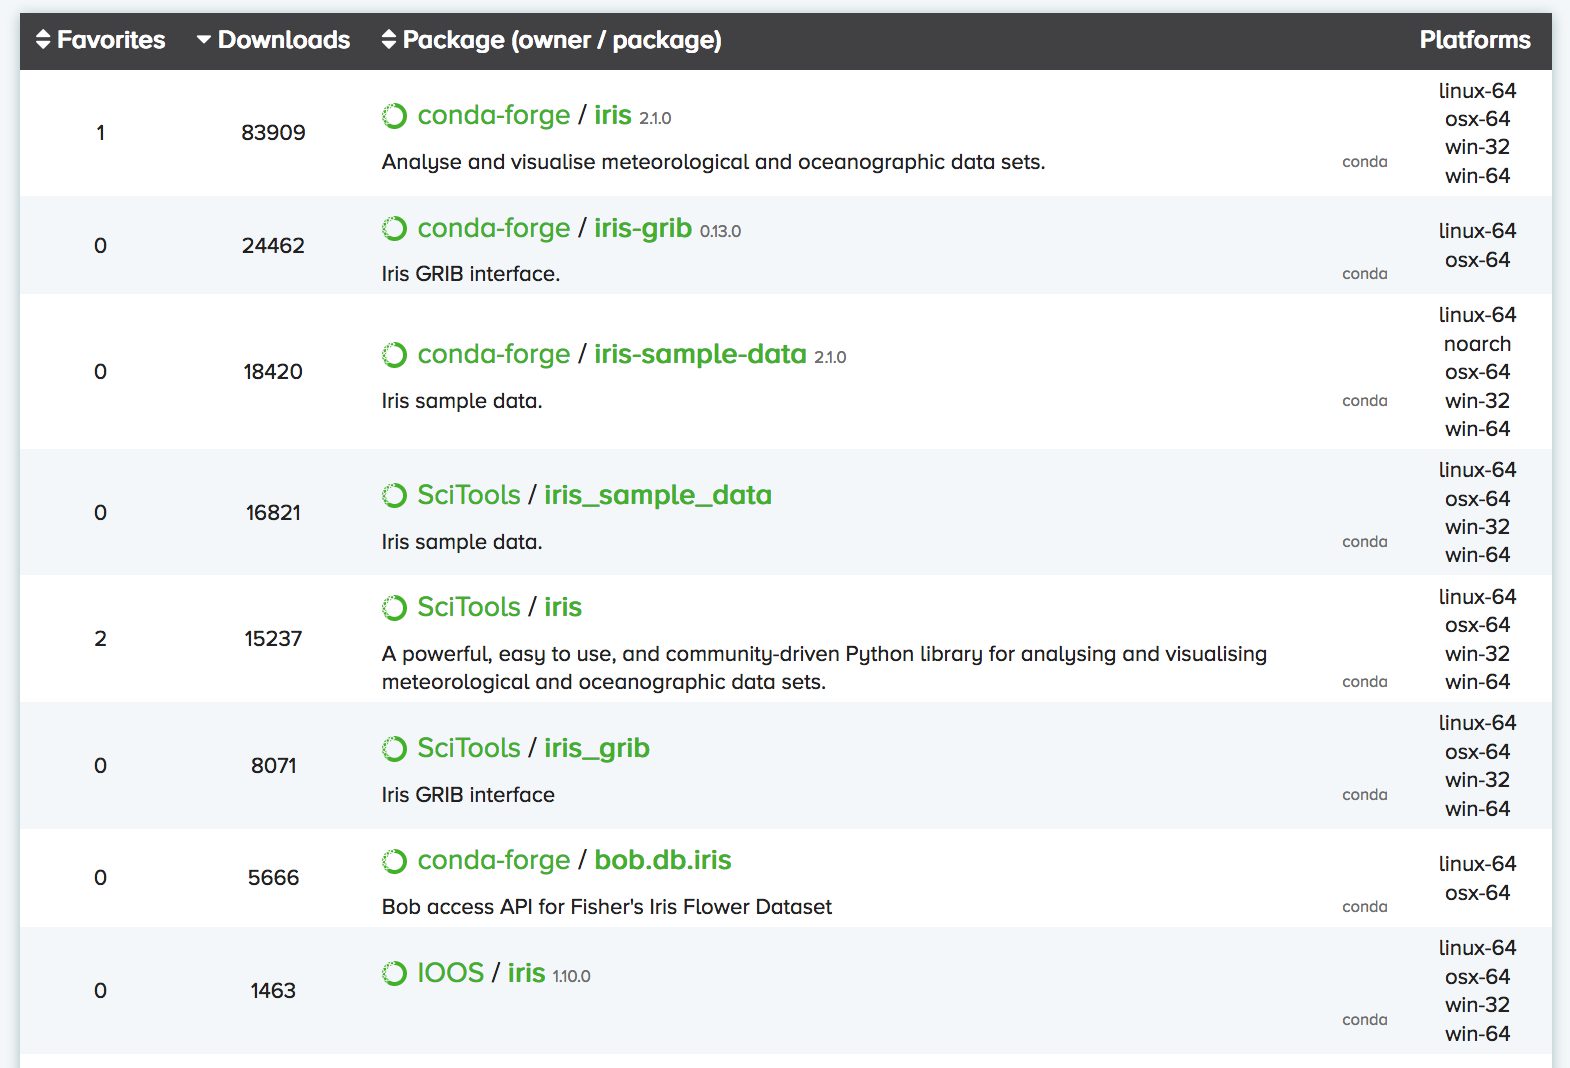
You can search Anaconda Cloud to find the command needed to install the package. For instance, here is the search result for the iris package:

As you can see, there are often multiple versions of the same package up on Anaconda Cloud.
To try and address this duplication problem, conda-forge has been launched,
which aims to be a central repository that contains just a single (working) version of each package on Anaconda Cloud.
You can therefore expand the selection of packages available via conda install beyond the chosen 400
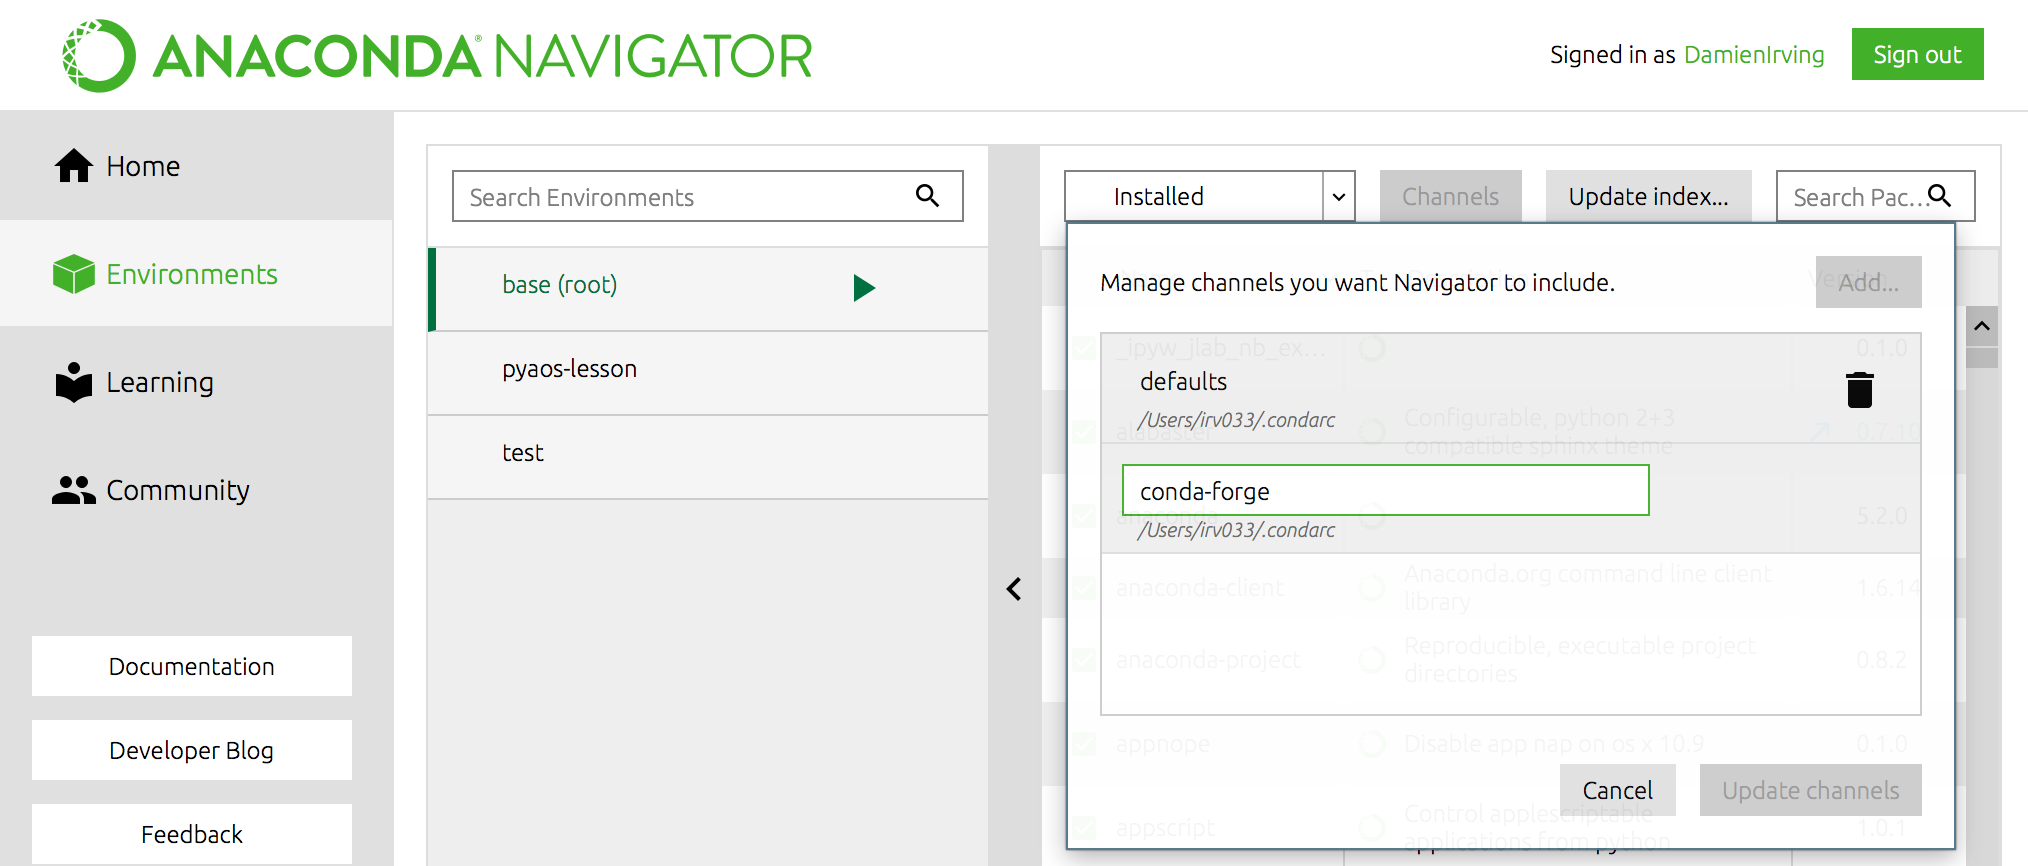
by adding the conda-forge channel:
$ conda config --add channels conda-forge
OR

We recommned not adding any other third-party channels unless absolutely necessary, because mixing packages from multiple channels can cause headaches like binary incompatibilities.
Software installation for these lessons
For these particular lessons we will use xarray, but all the same tasks could be performed with iris. We’ll also install cartopy (to help with geographic plot projections), cmocean (for nice color palettes) and jupyter (so we can use the jupyter notebook).
We could install these libraries from Anaconda Navigator (not shown) or using the Bash Shell or Anaconda Prompt (Windows):
$ conda install jupyter xarray cartopy cmocean
If we then list all the libraries that we’ve got installed, we can see that jupyter, xarray, cartopy and cmocean (and their dependencies) are now there:
$ conda list
(This list can also be viewed in the environments tab of the Navigator.)
Creating separate environments
If you’ve got multiple data science projects on the go, installing all your packages in the same conda environment can get a little messy. (By default they are installed in the root/base environment.) It’s therefore common practice to create separate conda environments for the various projects you’re working on.
For instance, we could create an environment called
pyaos-lessonfor this lesson. The process of creating a new environment can be managed in the environments tab of the Anaconda Navigator or via the following Bash Shell / Anaconda Prompt commands:$ conda create -n pyaos-lesson jupyter xarray cartopy cmocean $ conda activate pyaos-lesson(it’s
conda deactivateto exit)You can have lots of different environments,
$ conda info --envs# conda environments: # base * /anaconda3 pyaos-lesson /anaconda3/envs/pyaos-lesson test /anaconda3/envs/testthe details of which can be exported to a YAML configuration file:
$ conda env export -n pyaos-lesson -f pyaos-lesson.yml
$ cat pyaos-lesson.yml
name: pyaos-lesson channels: - conda-forge - defaults dependencies: - cartopy=0.16.0=py36h81b52dc_1 - certifi=2018.4.16=py36_0 - cftime=1.0.1=py36h7eb728f_0 - cmocean=1.2=py_0 - ...Other people (or you on a different computer) can then re-create that exact environment using the YAML file:
$ conda env create -f pyaos-lesson.ymlFor ease of sharing the YAML file, it can be uploaded to your account at the Anaconda Cloud website,
$ conda env upload -f pyaos-lesson.ymlso that others can re-create the environment by simply refering to your Anaconda username:
$ conda env create damienirving/pyaos-lesson
$ conda activate pyaos-lesson
The ease with which others can recreate your environment (on any operating system) is a huge breakthough for reproducible research.
To delete the environment:
$ conda env remove -n pyaos-lesson
Install the libraries required for this lesson
Go ahead and install jupyter, xarray, cartopy and cmocean using either the Anaconda Navigator, Bash Shell or Anaconda Prompt (Windows).
(You may like to create a separate
pyaos-lessonenvironment, but this is not necessary to complete the lessons.)
Key Points
xarray and iris are the core Python libraries used in the atmosphere and ocean sciences.
Use conda to install and manage your Python environments.